Foreword#
This series of articles will focus on how to implement a KASAN (or a memory access checker) on a microcontroller kernel.
The introduction is a reflection of my personal opinions and of the motivations that lead me to implement my KASAN.
The reader may find it cleaving, but they should find the rest of the article more technically oriented.
The need for a proper debug infrastructure#
Recently my wonderful wife designed and offered me the greatest present a kernel developer could imagine : a custom development board with a builtin SWD interface.
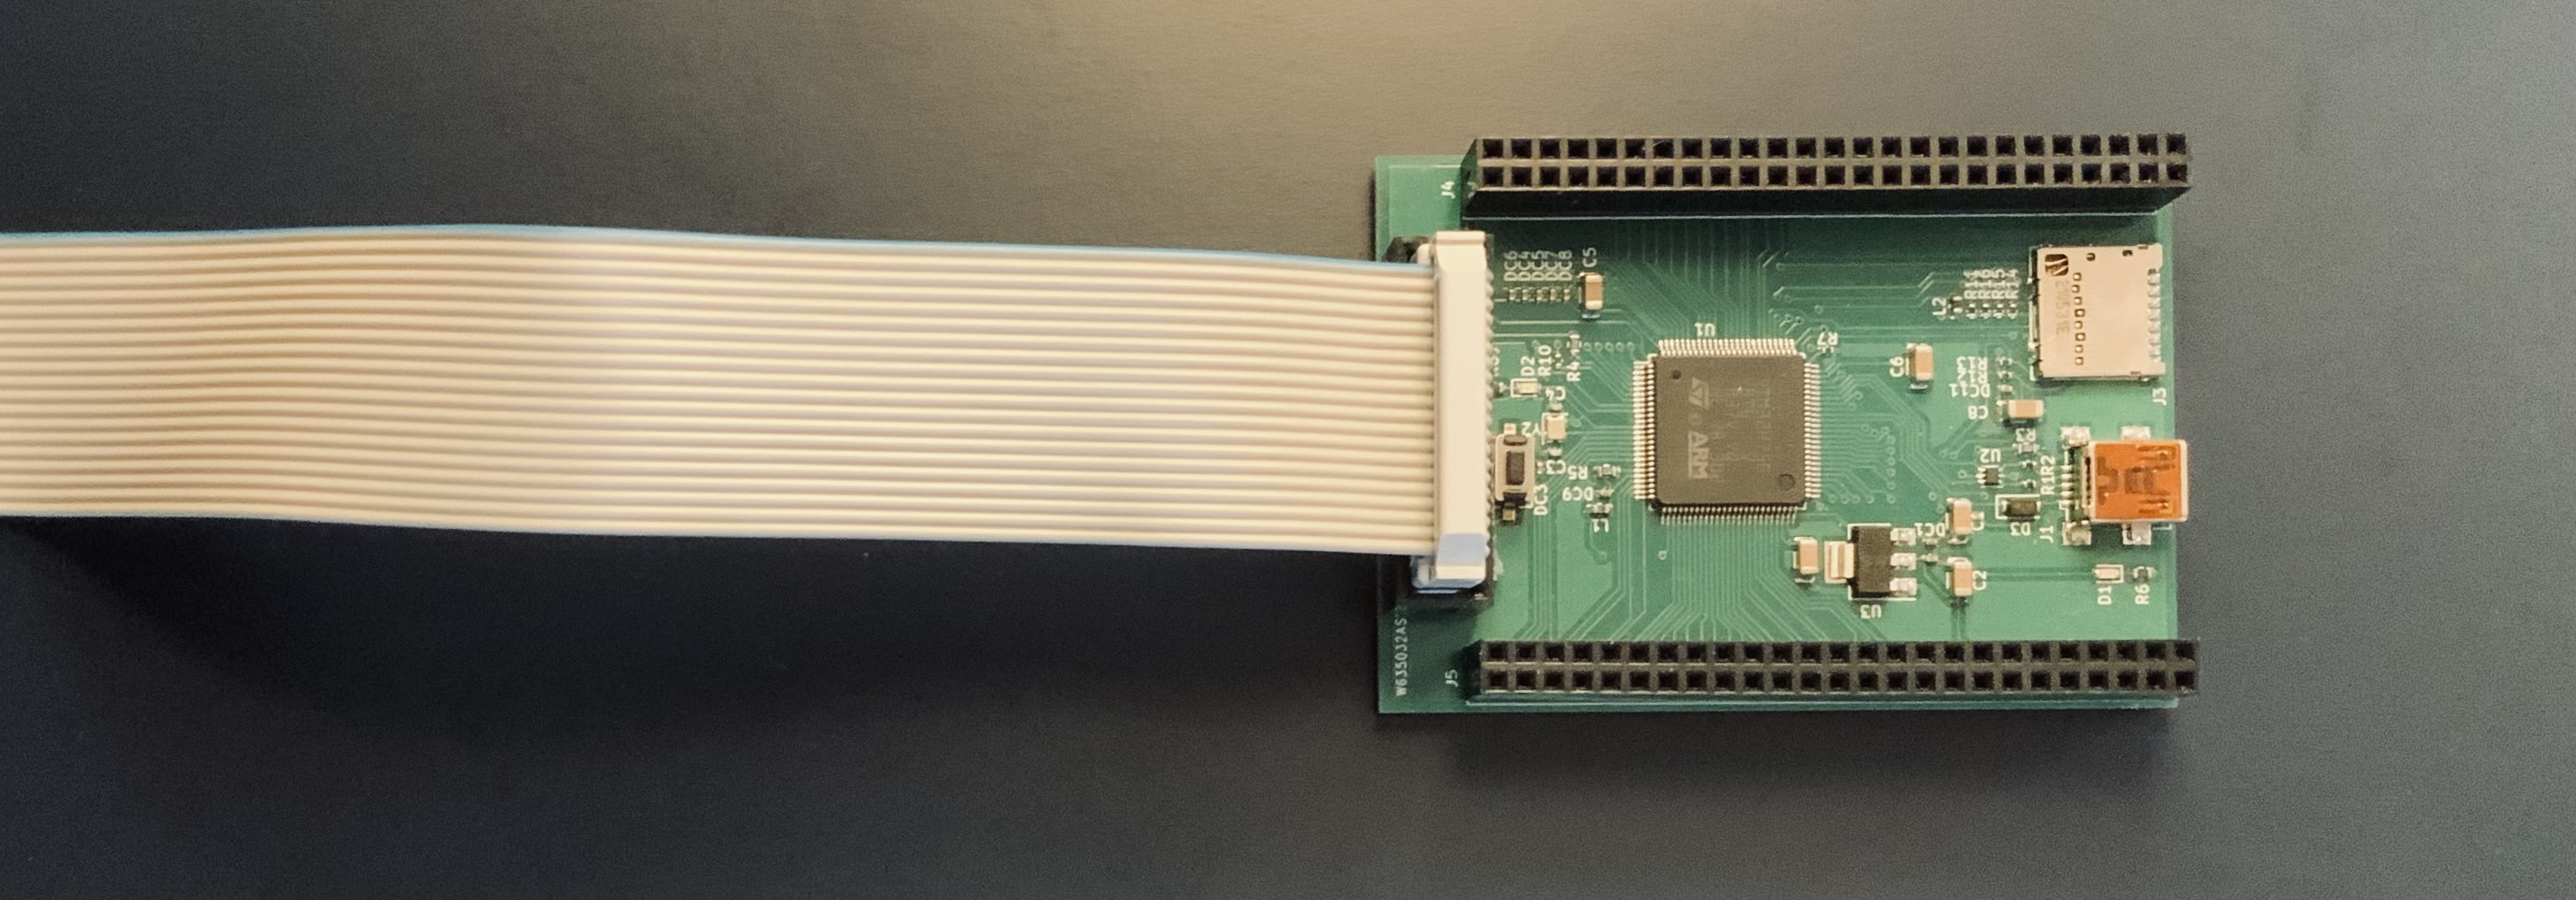
I had been looking for a devboard to get back to microcontroller programming for a while and my only need was a proper SWD interface to attach a debugger.
Seems like a pretty unrestrictive criterion, right ? False.
Mainstream development boards provide a dedicated bootloader chip connected to the main chip’s SWD/JTAG interface to handle the flashing for you.
Though it may seem like a good idea, as it avoids the pain of buying your own debug tools, it prevents you from being able to connect your own debugger.
Unless you are willing to trash those bootloader chips
A debugger I needed.
I rely a lot on debug tools to verify my code. My two most used tools are GDB to live debug, and valgrind to check for memory leaks / improper memory accesses. I consider valgrind to be the most essential correctness test, after “my code seems to do what it is supposed to do”.
Until recently, my strategy to debug code that aims to work on a microcontroller has been to code it in pure-C (no assembly) and to make it somehow work in a userspace process. That allowed me to debug it using gdb and valgrind.
Though this strategy works for abstract pieces of the kernel (not dependent on the actual hardware, ex : file-system, scheduler, resource tracking, etc…), this is hardly achievable for hardware-dependent ones, like drivers. One could think that we could just write an emulator of some sort and again run the driver in an emulated way. This works but will only give coverage on the behavior that the emulator supports. Failure to emulate an HW feature will lead to lack of actual coverage on that feature when run in real HW.
The best coverage we can get is to test the code under real operation conditions.
To achieve that, we need our favorite debug tools to work on embedded platforms.
Let’s make enemies#
The opinion in the embedded world seems to be
Your code just has to be correct, and if it's not, you can just debug with printf.
This is not a satisfactory answer. This barely works for simple software, at the cost of bisecting the code, but becomes a nightmare when you deploy complex software that does memory allocation.
Moreover, this relies on the fact that you have a kernel that handles your printfs correctly, to the UART that serves as log output. This implies either a booted kernel with device management initialized, or a very small kernel with embedded UART management. But what if we must debug the kernel itself ? What if the UART isn’t even available at that stage ? What if we are doing the bringup of the chip, i.e. testing boot / reset ? You won’t get any printf at that stage.
Stating that you can always debug using printf is absurd to the extent that, if you have access to a form of printf, you are potentially running your code in an environment like the Arduino framework. I can guarantee you that the people that developed this framework had some form of probe to debug the chip. When their programming and verification was done, they designed a board without this interface and sold it to you.
If the answer to that last statement is :
Code on a microcontroller should only be running simple software with statically allocated memory
This is not a satisfactory answer either.
Modern microcontrollers (whose name should likely be reviewed) operate at the megahertz scale, and can have around one MiB of flash or RAM. This is the very definition of “potential to run complex software”.
Rather, that answer is merely a consequence of the lack of proper debugging tools widely available in the mainstream embedded world, and of the lack of knowledge around it : developers took the lack of proper debugging infrastructure as an immutable truth and their practices evolved in that direction, validating that assumption.
But it is not an immutable truth. To be more precise, it is completely and utterly false.
This series of articles aims to prove that running your code in a microcontroller environment gives you a leverage to actually perform memory checking of the same or even better quality than one available in a typical userspace process.
Disclaimer#
The KASAN implementation presented in this series is not open-source nor free, and this series of articles is not a tutorial on how to use such code.
This is mostly due to two factors :
- a
KASANis tightly coupled to the kernel that it is implemented in. As my kernel is closed source, such is myKASAN. - I’m not a very nice guy :).
Rather, it aims to give a solid base for whoever wants to add a KASAN to their kernel, so that when executing the following piece of code :
u8 faulty_function(
    void
)
{
    u32 *mem = kernel_malloc(sizeof(u32));
    kernel_free(mem);
    kernel_free(mem);
}
the kernel goes from an ugly crash to :
Kr0 started. Welcome.
Kr0 initialized.
Kr1 started, core1 0x0 online.
core1 : 0x30044900.
Kr1 initialized.
Kr2 started.
Kr2 initialized.
Initializing pre-smp kernel modules.

Double free.
Unexpected kasan attrs found during attrs set at address 0x20014038.
Expected type : USR_ANY (exact match).
  NO ACCESS_ALLOCATOR | ACCESS_USER
Read type : ALL_RWI (exact match).
  ACCESS_ALLOCATOR | NO ACCESS_USER | READ_WRITE | INITIALIZED
Incompatible attributes are :
  ACCESS_ALLOCATOR | NO ACCESS_USER
Though, to illustrate my points and give implementation details, I’ll sometimes provide code samples. For all intents and purposes, I declare this code as part of the public domain.